The intent of this project was to serve two purposes. First, to incorporate a weather camera with my existing personal weather station, and second, to prototype a potential wildlife camera solution for my mountain property. The future wildlife camera will eventually build on aspects of the weather camera project and will include motion tracking. Since there is an abundance of wildlife that passes through the property, and I’ve always enjoyed wildlife, the goal will be to detect and track wildlife as it passes through the camera’s field of view.
For the weather camera project I utilized the following items:
- Pan, Tilt, Zoom (PTZ) Wireless IP Camera
- Blue Iris Video Management Server
- Ambient Personal Weather Station
- HomeSeer Automation Server
With respect to the IP camera I selected, I could have opted for a simple stationary IP camera, but with the secondary goal being motion tracking for a wildlife camera, a PTZ camera was chosen. Eventually I will get a second PTZ camera to serve as the wildlife camera since the two purposes are specific and need to remain independent from each other.
To take advantage of the PTZ feature of the camera, I decided to have the camera automatically orient itself in the direction of the wind. The thought being that any potential inclement weather would come from the direction of the wind, so orienting the camera in that direction would provide real time imaging of incoming weather.
Installation
The first step was to install the IP camera, and since the focus is to capture and report weather video and images, I needed to install the camera as high as possible. Because I live in a neighborhood with one and two-story homes… and an annoying HOA, my options were limited. Though it wasn’t ideal, my only feasible option was to mount the camera as high as possible on the outside chimney facade of the fireplace.
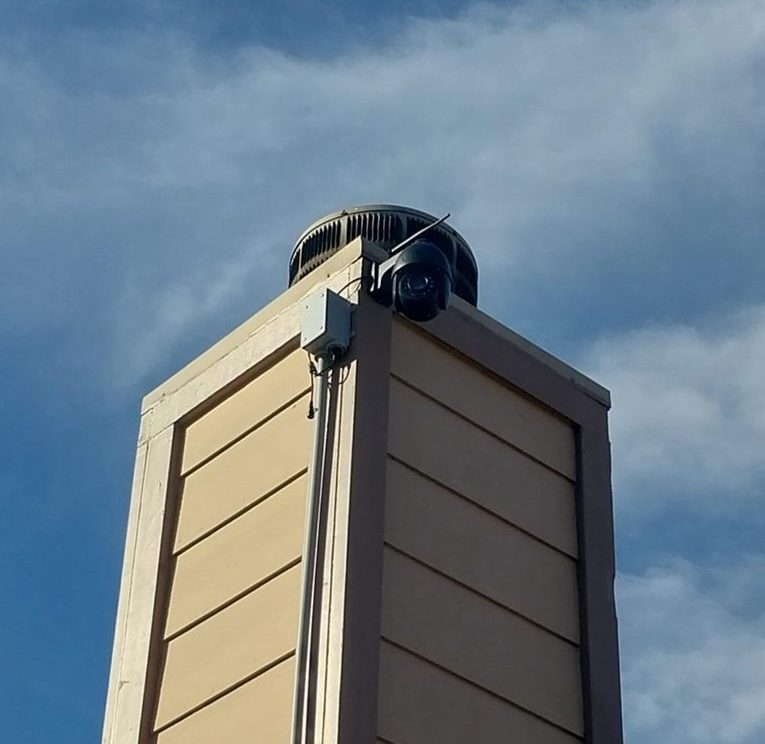
During the installation, even though the power cord is rated for outdoors, I ran it through conduit and junction boxes to give it a cleaner look and better protect it from the elements. Once installed, the initial setup was fairly straight forward using the manufacturers app. By default, the camera is configured with a dynamically assigned IP address. I changed it to a static IP in order to have a constant network reference. I also created a local DNS entry for the camera to make it easier to manage and incorporate into other aspects of my automation environment.
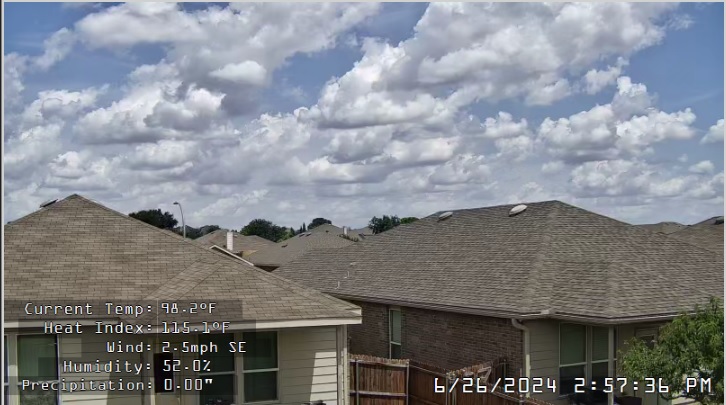
Next was to add the new camera to the Blue Iris server. I have several IP security cameras and use Blue Iris to manage them. It is a feature-rich product and integrates well with my home automation platform. When adding the weather camera to Blue Iris, I configured the file transfer (FTP) feature so images can be sent and shared with the uploaded weather data from my Ambient weather station.
The last configuration needed was to establish predefined setpoints for the camera that would represent the general direction the wind was coming from. As the wind direction changes, the reported value would be used to determine which setpoint the camera should move to. With everything installed and the initial configuration complete, the next step was to program the functionality that would control the movement of the camera based on wind direction.
Programming
Controlling the motion of the camera turned out to be a multi-step process. The weather station updates the home automation server on a regular basis with various data values. The thought was to retrieve the reported wind direction and use that value to orient the camera to a predefined setpoint for the given direction (N, NE, E, SE, etc).
As I examined the messaging between the weather station and home automation server, I discovered the weather station was reporting the actual azimuth direction and the value was being converted into a cardinal direction for display purposes. This became a challenge because I didn’t have insight into the code that was doing the conversion to cardinal direction. This meant I needed to determine the range of azimuth values the weather station was using to represent the different cardinal directions.
To solve this issue I would need to build a conversion matrix based on the reported azimuth values and the displayed cardinal direction. I started by creating general azimuth ranges to represent each of the four general cardinal directions… 360 – 2 for N, 90 – 92 for E, etc. I used narrow ranges to start because it would allow me to easily capture anything reported outside of those ranges, and then gradually expand the range values and add additional cardinal direction groups as necessary. When completed, I ended up with five direction groups because of how the camera was mounted. The chimney blocks a portion of the viewable rotation area so it didn’t make sense to create a setpoint for a blocked view. For any of the reported directions that would have resulted in a blocked view, I would use the next closest viewable direction.
With the azimuth direction mappings created, the final step was to build the conditional logic that would determine which predefined setpoint the camera should orient to. This would be based on the cardinal direction that was converted from the reported azimuth direction. Once the setpoint is determined, the value is sent to the camera via a JSON command which instructs the camera where to move.
Executing Movement
Finally, to automatically change the camera direction based on the wind direction. Within the home automation server, I created a rule (Event) that runs on a recurring schedule and executes a script. The script determines the last reported wind direction azimuth and converts it to the appropriate cardinal direction, which then defines the setpoint to use. I may update the rule and change the triggering condition from a recurring schedule to whenever a change in wind direction is reported. I initially used a recurring schedule because it was easier to capture reported values while testing.
The next project might be a complete update of my home network….